After investigating the various concepts for repairing our leaky building envelope, we settled on the roof as the most effective place to insulate. We would like to have purchased new insluating windows as well, but the expense was offset by the limited R-Value benefits derived from window replacement.
The seventeen existing windows did, however, still require major attention from us. Some time, perhaps in the 1960's, the window sashes were replaced and most are still in good (or at least passable) condition. We did entirely replace two windows in the "master" bedroom with a double-pane vinyl sliding glass door that was donated by Sue's sister and husband (replaced when Steve designed an addition to the back of their home). This allowed us to install a much-needed dog door for our American Eskimo dog, Siku.
Many of the remaining 15 window sills had rotted away over the 76 years since they were originally set in place, especially on the south and east sides of the building. The sill restoration project consisted of two levels of repair. Sills that were damaged but servicible received epoxy wood repair to replace any rotted areas (there were many). Some sills crumbled into splinters and dust when removed; these were replaced with treated wood replacement sills.
Overall, many energy gaps were filled when the sills were repaired.
Wednesday, November 08, 2006
Monday, October 30, 2006
What is the First Step?
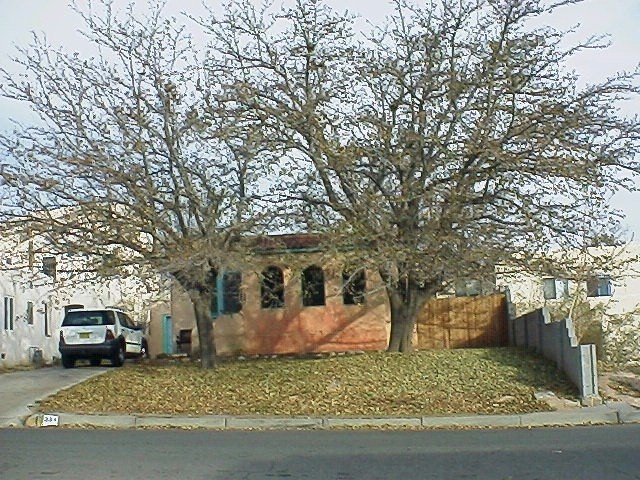
In the southwest region of the USA, the worst sun exposure occurs as the sun traverses the western end of the sky. Our house is graced by two lovely full-grown mulberry trees that shade our western exposure. If this were not the case, we would have planted two fast-growing trees at the west side of the house.
Thus, the first step we undertook over the course of several years was to redesign the flow of water at the front of our site. We have a steep front yard and the existing water flow allowed storm water to drain directly into the street, washing away our topsoil, reducing retained landscape water and exposing tree roots. We added a rock landscape at the lowest edge of the site that stopped water from leaving the site. The photo shows the topography before we added the rock landscape.
Below are some great guidelines cribbed from the City of Palo Alto, California:
Provide a minimum slope of 2% away from the building foundation, as required by the Uniform Building Code.
The drainage for surface runoff should not require the use of area drains or pipe collection systems.
Avoid the use of dry wells.
In no case shall the final grading increase the normal sheet flow onto adjacent properties.
Downspouts should directed to splash blocks (minimum 2 feet long) that deflect the water away from the building.
Direct roof and site drainage to pervious areas of the site. Design the site drainage to take full advantage of these pervious areas.
Provide drainage paths on and from impervious areas (driveways, patios, etc.) that should always be sheet-flow drained into a pervious area. No catching of this water into area drains should occur.
Home Improvement for a Reason
There are so many reasons to improve a house. Perhaps the owner wants to sell and move to a larger (or smaller) house, or to increase the value of his/her existing house, or to encourage neighborhood development. Our reason is simple. We want to improve our energy efficiency toward the goal of being relatively self-sustaining within the existing energy infrastructure.
Our house is small - 850 SF for the main house and a 200 SF stand-alone guest house. We are located within an urban environment in a neighborhood of single family, duplex, and small apartment building type residences.
Located in the Nob Hill neighborhood of Albuquerque, New Mexico, we are within walking distance of restaurants, shops and a grocery store (hey, Nob Hill merchants, a hardware store would be a great addition!)
Subscribe to:
Posts (Atom)